


Three Important Things Before We Fly The Yu Xiang Apache F11-S
Three Important Things Before We Fly The Yu Xiang Apache F11-S
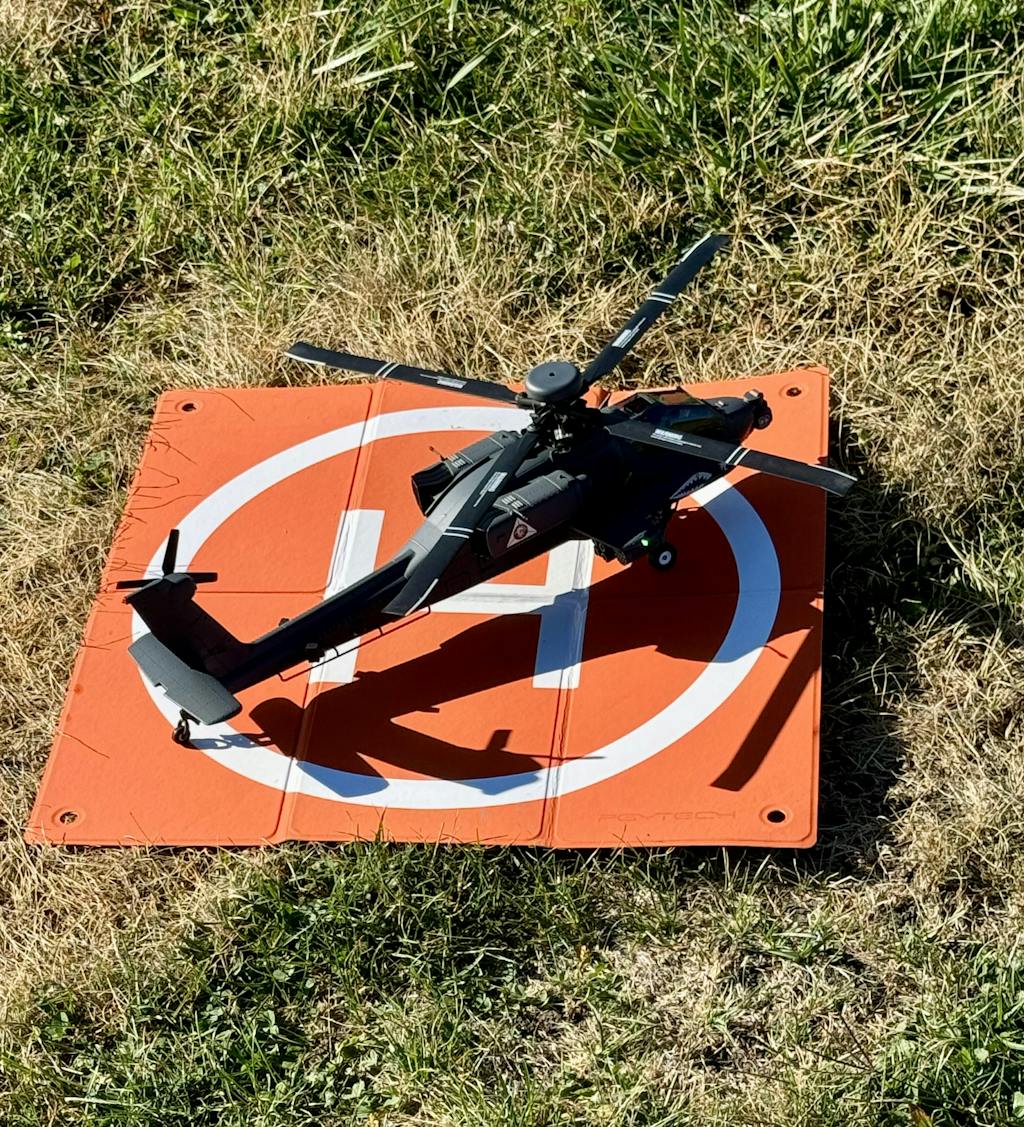
So here it is guys the RTRhobby Yu Xiang F11-S 1/32 scale Ah-64 the Apache helicopter. That's where you guys can pick one up too this thing looks awesome and flies great except for Oval RC did make some mistakes and he doesn't want you guys to make the same ones keep watching the video.
It's time to test this helicopter out first. We're going to turn on the radio by pressing the button on the radio got a radio on and next we'll turn on the helicopter by pushing and pressing on the white button there all the lights will light up on the battery set it down into place. It locked into the satellites so it looks like he does. We're ready to take off so the props are locked right now, and you can unlock them by hitting the switch. We'll do that next and we'll pull the triggers down into the outside that'll fire up the blades got it in GPS mode. Right now and Auto helicopter fires up we're going to get it up in the air. okay so guys Oval RC did something wrong. He opened up the box, and he put the batteries in the transmitter turned it on charge the battery and the helicopter turned that on. Oval RC let the light go green on top and he took off and guess what you can't do that.
There's three things you need to do so you don't crash and Oval RC is going to tell you what it is right now. So he did get the helicopter all back together and he went home and read the book.
So it's not part of three things you got to do but you got to read the book especially this yellow one right here that comes with the helicopter this is the s model, it's supposed to be the smart model but the helicopter is only as smart as the operator and if the operator don't read the directions well then it's not going to work all right.
The three things you must do before you take off you got to calibrate the the gyro number two you got to establish a safe place to take off and land number three and you got to do GPS calibration. So the first thing we're going to do is calibrate the gyro and this is for mode two so if you have one of these you're going to know what Oval RC is talking about because apparently if you're in America it's going to come factory set to mode two, you're going to turn on the radio and turn on the helicopter, we're going to do that right.
Now the next thing you want to do is level the helicopter. Oval RC uses the charging block and you want to make sure that the helicopter is nice and level right where the battery goes into the helicopter. The next thing you'll need to do is wait till this green light here turns a solid green color that means means it's locked in the GPS. Next thing you'll need to do is move the left stick to the upper left hand corner the right stick to the lower right hand corner the light will start to Blink and then turn red and then green release. The sticks now your gyro is calibrated. Next you'll want to turn off the helicopter and turn off the radio reach underneath the helicopter like this press the button turn the power off and turn off the radio number two is almost as important as number three and you want to establish a place to take off and land. So this helicopter has a safety building to it that when you're out here flying around and the battery goes low. It'll come back over to the spot you took off hover for a little bit and land automatically it did it twice for me already. It works really well too so you want to make sure you don't take off underneath a tree in the back of a truck around your friends or really anywhere you don't want to land. So remember that and the way you establish your takeoff spot is when you turn on the power so turn on the radio turn on the helicopter and when that light on top of that helicopter there turns green you just established where that helicopter is going to land too so remember that CU it's very important. We got our safe spot out here in the fields so we're ready to turn on the radio and the helicopter okay now we'll press the silver button on the transmitter press and hold that next we power on the helicopter press and hold the button all the lights light up and the light on top is blinking yellow. Now it's blinking green and he is just going to leave it sit there. Oval RC can't show you guys but it's blinking green right now because it's picking up a satellite signal and it also shows that on the transmitter right now too we got the beep on the transmitter we got the solid green light on the helicopter.
Now the most important thing the third thing that you guys need to do is we need to calibrate the GPS and you need to do this every time before you fly or else you risk crashing that helicopter next we'll calibrate the GPS and you do that by moving the left stick to the lower leftand corner right stick to the upper right hand corner and on top of the helicopter you'll see a flashing yellow light release the sticks going to lift up the helicopter like this and you're going to turn it really slowly in a horizontal position and you're going to do that till the light on top starts flashing green and it is kind of hard to see colors look really close. It's like a light yellow and a light green but you keep turning it till the light flashes green. We got the green flashing light next you're going to point the nose down on the helicopter hold it in a vertical position just like this and you're going to turn it really slowly in the vertical position until we get a solid green light all right.
You guys can see we got the solid green light now we're ready to fly this helicopter all right now we need to unlock the propeller and we'll do that by pushing up on that switch right there unlocking it and you're going to hold the sticks down on both sides. We're going to go out and down here we go just like that and we're going to go up in the air with the helicopter. We do got a little bit of a wind going today but the helicopter is staying right in position where it needs to be we'll move it slowly to the left can hear it buzzing just a little bit. But Mark got full control, we got about oh 5 to 8 mph wind maybe with a 10 mph gust but this helicopter is holding steady you guys can see how important calibrating that GPS is. Oval RC doesn't even have his hand on the sticks, but the helicopter is locked in the GPS.
We did those three most important steps. Oval RC was telling you about now this thing flies awesome. Let's move it forward. He is going to spin around trying to make it easy for his camera crew. Here just showing you how good this helicopter flies even in the Wind. He'll even lower it down to the ground flying about a foot off the ground looks great even with the wind coming across. This field like it is that helicopter is nice and steady. That Apache looks so cool all right guys. Now he is going to show us this return home feature quick. We're going to fly off to the side here, we're going to keep going and now Oval RC is going to hit return and land that's the switch on the top right. Let's see how that works okay, it's in return mode. Right now he doesn't have his hand on the sticks. The helicopter is landing right where we took off it's hovering right now it's getting in position and here it comes down right here. Oval RC got no input at all in the sticks right now and how cool is that and that's why number two is so important because picking that spot to land, you can come back when you need to just by hitting that switch right there. Let's get it back up in the air.
We're going to go off to the left helicopter flies real nice and straight patchy looks great we're going to turn around. Oval RC is going to do a high speed. We go this is wide open and low, you have a low and a high this is in auto in low that's as fast as it'll go now. We're going to go in high we can switch it we can press the high button right here switched it over to high now we'll see how fast it goes in high just a little bit faster than low, because we still are in Auto. We'll go up and now we're going to go in now we're going to go in manual so he flips it the manual in high. We're going to go fast to the right here we go and that's top speed and that thing's moving along pretty good make sure our camera crew can get it.
We're going to be coming right by you ready here we go speed pass got really good speed too oh we do got a beep so we're going to go back to Auto. The transmitter just started beeping and this is perfect because now the helicopter is going to come back that means we got a low battery situation, the helicopter is automatically returning. Oval RC has his hand off the sticks, this happens quite often because you got about a 10-minute flight time so it come back to the spot where we took off. It's getting in position and coming down automatically on its own came back all by itself landed it all on its own and he is confident that it's going to do that too because after doing those three things everything goes as planned all right, you come up to the helicopter always lock your blades that way just in case anything would happen it doesn't happen.
Oval RC told our guys this helicopter really flies great and it does come in this really nice case. He thinks it's aluminum with aluminum trim and the helicopter does have the fail safe return straight return one button landing and the smart low power return. He tried all of it it works great picture of the helicopter right on the front of the Box. Let's get it opened up so you can see what it was like when Mark was unboxing the helicopter nice foam padding inside the box, it's got your owner's manuals right on top. You have your user manual he would read this too has a nice foam padding right on top. We'll move this right out of our way right in the side pocket, here we have a wall charger looks like an adapter for the wall charger a really nice looking transmitter. It has some protective foam right over top of the sticks, we'll remove that you guys can see what this looks like at the back of the box, we have some tiny screws screwdriver an allen wrench and a wire charger. We'll go over that in just a little bit too spare set of blades and he can't tell you how important that was get a spare rear prop and in the bag also has some stickers. He got two batteries with this helicopter and Mark would suggest our guys get at least two batteries because it takes about 2 hours to charge the battery and got about 10 minutes fly time out of it. Mark got two spare tires for the helicopter and a charging base for the batteries all right now. We can take a really close look at this awesome helicopter if you guys ever put together a plastic model well that's how detailed, this is because actually has rivets on the body that you can and he guesses you're supposed to screw that down although Mark just has that sitting on there for now and you have the battery right here so you're going to squeeze this battery like that in order to lift it out try to make that happen for you guys there we go anytime you want to power up the helicopter or check how much battery power you have you just press and hold this white button right here on the battery wait till the LED lights light up and you can see we got two bars lit up out of the four, so we have about 50% battery power left now. Mark'll show us how to install the battery so you have the power button and lights on this side here and on this side you have the tabs that you'll squeeze together just like that. So you're going to install the battery just like this carefully work it down inside the helicopter just like that and then press down at the same time squeeze in these tabs right here press down though it clicks into place all right.Mark is sure a few of you were wondering whether he broke anything off the helicopter when he crashed and he did you know this is a light plastic just like a plastic model he broke the tail wheel in several pieces although he was able to glue it all back together and it looks like brand new again and he also broke this Wing off of here too but you can kind of see the glue wrapping around the side if you look really close but it looks just as good as new and it flies good as new too helicopter also has LED lights on each side it has green on the right and red on the left and right on top of the helicopter is the light that Mark was talking about throughout the video now you can see what the transmitter looks like up close and at the back of the transmitter you have a battery door and behind that where you'll install the four AA batteries transmitter has flip up antennas go like that you'll face one this way and face the other one in an opposite direction at the bottom of the transmitter you have four buttons you have a camera button you have a land now button your high and low speed button on this side here and the mode button on the screen on the transmitter you have your battery power for the transmitter and battery power for the helicopter you also have a compass right in the middle which tells you which way your helicopter's traveling right above the screen is where you have your trim buttons the joysticks felt really good when flying and they feel like they're aluminum too got very important switches at the top of the transmitter we have this switch right flip it up in the helicopter do figure eights flip it down and make the helicopter do circles this switch right here is the auto and manual switch flip it up in the auto that's where he flew most of the time it uses the GPS signal very easy to fly just like a drone you can flip it down into manual and that'll give you more control at the sticks this switch right here is the lock and unlock position in the lock position that's what you're going to use when you're putting the battery inside the helicopter when you're working around the helicopter and you don't want those blades to accidentally spin up on you and get you in the hand when you're ready to fly go ahead and put it in the unlock position now you're ready to take off with your helicopter then you have the GPS switch flip that all the way up.
If you don't want to use GPS at all like a flying indoor or if you're outside flying and you just want to use the sticks and you don't want to use the GPS if you want to use the GPS flip it in the middle and you can fly out any location basically and leave go of the controls and the helicopter will stay right where it's at using that GPS signal can flip it all the way down that's the return to home feature so if you're way out in the field and flip down that switch the helicopter is going to return to where you took off hover there for a little bit and then come down and land and then it will turn off the blades at any time that you're in this position here you're flip down you can abandon the landing and go to a manual Landing if you want although it's really easy to use just by flipping down that switch.
Next Mark is going to show us how to use this really cool charger that came with the helicopter they are going to plug our power adapter right into the side just like that plug our balance lead right into the other side and he'll go ahead install our battery right into the battery adapter just like that and you're going to see all 10.9 and then it's going to go B1 B2 B3 what it's doing is telling you the voltage of each cell so this is a three cell lipo battery and each cell is roughly 3.64 3.65 volts, so you can also see if the cells are balanced too that's really helpful, next we're going to go ahead and plug it into the wall here or plug it into our cord and it's going to start charging so while it's charging you will see these numbers come up so it's going to read 365 366 all the way up to 4.20. He believes per cell and then when it's full this will start beeping when the batter is fully charged the most important thing you need to know about charging batteries is never leave them unattended never plug them in and walk away always keep an eye on your batteries when you're charging them.
One last thing if you want your batteries to last for a long time you should never store them fully charged for any length of time you should run them down a little bit put them in storage mode till about 3.8 volts per cell you can't do it with this charger here cuz it doesn't have a discharger so you will have to stick it back in the helicopter and run it for a little while if you guys are looking to get one of these you can get it at rtrhobby.com
Product Showcase
